
Cardamom and Orange Cannelés: The Science, History & Flavor of France’s Most Demanding Pastry
Cannelés are one of those pastries I love eating but don’t make as often as I’d like — and this cardamom orange cannelé recipe is the version I keep coming back to. I tried making them in silicone molds a few years ago, and the results were consistently not that good. But a few months ago, M took a work trip to Paris, and I asked/begged him to get a couple of copper cannelé molds from Dehillerin. I fell in love with my little copper molds, perfectly shaped with their ridges just waiting to be seasoned with warm, melted beeswax before they could be used.
This version layers ground green cardamom and fresh orange zest into the batter, both steeped in hot milk before the batter is strained and rested overnight. The result is a cannelé that tastes unmistakably French but carries the warm, floral depth of South Asian spice.
Why This Cardamom Orange Cannelé Recipe Works
A great cannelé lives and dies by two things: the mold and the rest. The copper conducts heat so evenly and aggressively that the batter develops a deeply caramelized, almost lacquered crust in the time it takes the interior to set into something soft and custardy. No other material reliably produces that contrast.
The overnight rest is not optional. It gives the flour time to fully hydrate and the sugar time to dissolve, which produces a smoother, more cohesive batter. It also allows the cardamom and orange aromatics to fully infuse into the milk, making the flavor more rounded and less sharp.
What Is a Cannelé?
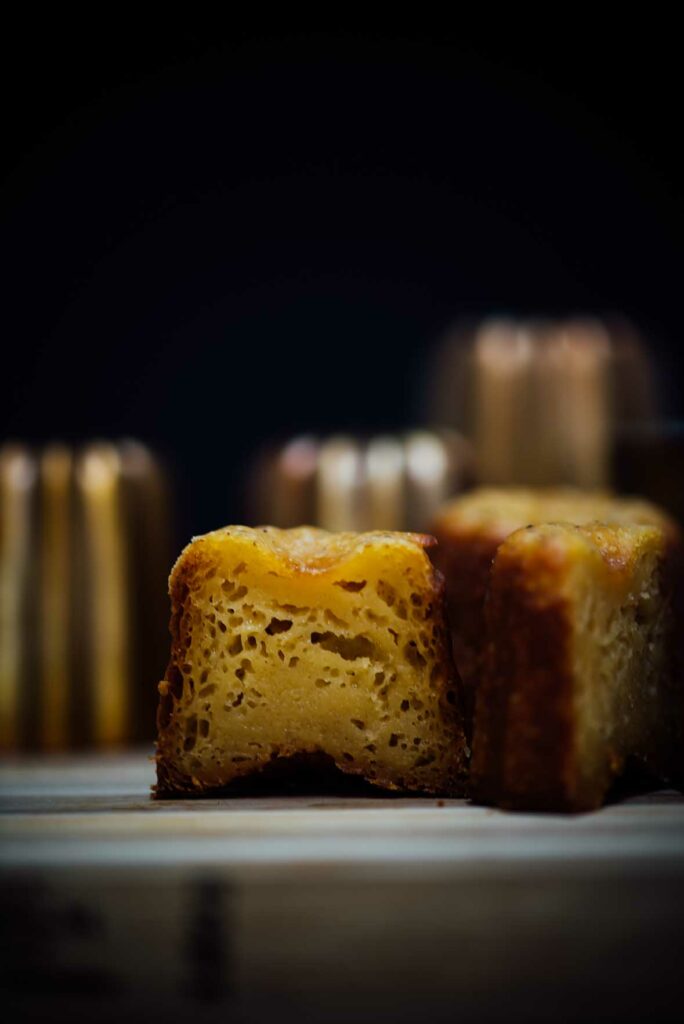
A cannelé (also spelled canelé) is a small French pastry from Bordeaux, baked in a deeply fluted cylindrical mold. The outside is a dark, crackling caramel shell. The inside is soft, almost flan-like, dense with egg yolk and rum.
The traditional recipe uses vanilla and rum. This version swaps the vanilla for green cardamom and orange zest, which pair naturally with the dark caramel of the crust and the richness of the custard interior.
A Brief History: From Bordeaux to the Global Pastry Canon
Cannelés have been made in Bordeaux since at least the 18th century, though their exact origin is disputed. One widely told story connects them to the Ursuline nuns of Bordeaux, who are said to have used surplus egg yolks (left over after winemakers used the whites to clarify wine) to make a small fried or baked cake. By the 20th century, the pastry had largely been forgotten outside Bordeaux, but a revival in the 1980s brought it to international attention.
Today cannelés appear in pastry shops across Japan, South Korea, the United States, and beyond, often in flavored variations that move well past the original vanilla and rum. Cardamom and citrus are among the most natural companions to the caramelized base.
The Flavor Science Behind This Cannelé Recipe
1. Why Copper Molds Matter
Copper has one of the highest thermal conductivities of any material used in cookware, roughly ten times that of stainless steel. When you place a beeswax-coated copper mold filled with cold batter into a 450°F (230°C) oven, the copper transmits heat to the batter almost instantly. The outermost layer of batter heats and dries rapidly, promoting both caramelization and Maillard browning before the interior has fully set. That difference in heating rate creates the contrast between the dark shell and the custardy center.
Silicone, by contrast, insulates rather than conducts. The heat reaches the batter slowly and unevenly, which is why silicone molds rarely produce the deeply caramelized crust that defines the pastry.
2. The Role of Beeswax in Making these Cardamom Orange Candles
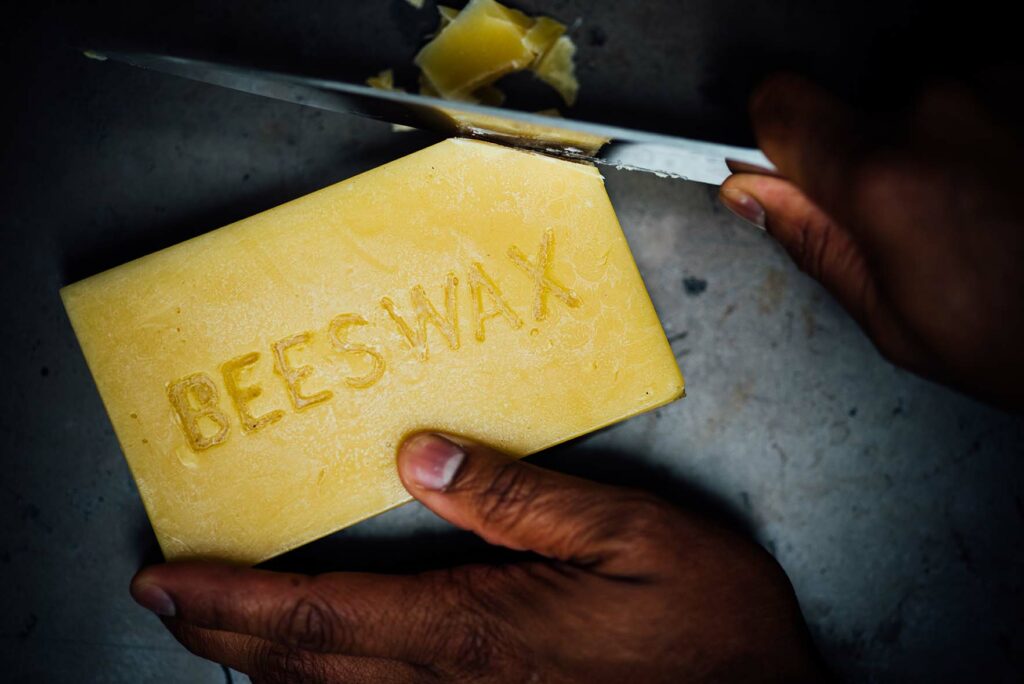
Beeswax serves two purposes. First, it is a release agent, preventing the batter from bonding to the copper as it caramelizes. Second, and less obviously, it contributes to the glossy finish of the exterior. The wax melts as the pastry bakes and coats the surface, producing the characteristic dark lacquered sheen.
Beeswax melts during baking but is far more thermally stable than butter alone. It helps create an even coating on the mold and contributes to the glossy, lacquered finish associated with traditional cannelés.
3. How Cardamom and Orange Aromatics Work in the Batter
Both cardamom and orange zest contain several volatile aromatic compounds that are fat-soluble. Steeping them in hot milk that also contains melted butter allows those compounds to dissolve into the fat and distribute evenly throughout the batter. Straining the batter removes the spent zest but leaves the flavor behind, concentrated and smooth.
Cardamom’s aroma comes largely from compounds such as 1,8-cineole and α-terpinyl acetate, which contribute its cooling, floral, and slightly resinous character. Orange zest brings limonene, which is bright and citrusy. Together, they lift what could otherwise be a very heavy, dense custard.
4. The Overnight Rest and Gluten Relaxation
Mixing flour into the liquid hydrates gluten-forming proteins and starch granules. During the overnight rest, the starches absorb more liquid and the batter becomes more uniform, which contributes to a smoother interior texture.
Tips for Making This Cardamom Orange Cannelé Recipe
Season the molds properly before the first use. This is as important as the molds themselves. I used Dominique Ansel’smethod: melt beeswax, brush the molds inside, bake at 400°F (205°C) for 10 minutes, invert to drain, and repeat three more times. This creates a seasoned surface that releases cleanly and contributes to that shiny exterior.
Use edible beeswax pellets. They are much easier to melt than a block. If you can only find a block, chop it into small pieces before melting.
Do not overfill the molds. Fill each mold to about 1/4 in (6 mm) from the top, about 2 3/4 oz (80 g) of batter each. The batter will rise slightly before sinking back down as it bakes.
Start hot, then drop the temperature. Baking at 450°F (230°C) for the first 20 minutes builds the caramelized crust. Reducing to 350°F (175°C) for the remaining 35 to 45 minutes allows the interior to cook through without burning the exterior.
Do not overmix the batter when reincorporating before baking. Air bubbles in the batter will disrupt the texture of the interior. Fold gently.
Storage
Cannelés are best eaten the day they are made. The crust softens as it sits and loses its crunch within a few hours. That said, I have found that freezing cooled cannelés in a zip-top bag for up to 2 to 3 weeks works well. Thaw at room temperature before serving, and eecrisp in a 350°F (175°C) oven for 5 to 8 minutes.
Copper cannelé molds do not need to be washed. Wipe clean with a dry towel after each use.


Cardamom and Orange Cannelés
The fresh sweet scents of orange and cardamom come together in one of my favorite pastries. This recipe is based on Dominique Ansel’s The Secret Recipes.
- Yield: 10 medium cannelés (about 2¾ oz or 80 g each)
Ingredients
Beeswax (for the molds) as needed
1½ cups/352 g whole milk
3 Tbsp/42 g unsalted butter (84% butterfat)
1 tsp ground green cardamom
1 tsp fresh orange zest or orange extract
3 large egg yolks
3 Tbsp/38 g dark rum
½ cup + 2 Tbsp/94 g all-purpose flour
¾ cup + 2 Tbsp/180 g granulated sugar
½ teaspoon/1 g kosher salt
Instructions
Purchasing, Preparing, and Caring for the Cannelé Molds
– There are several options when picking out cannelé molds, but I recommend using copper-lined ones. Copper conducts heat exceptionally well and ensures a crispy exterior and moist flan-like interior as the cannelés bake.
– If you are using copper cannelé molds for the first time, it is important to season them properly. The traditional way is to use beeswax. Preheat the oven to 400°F/205°C for conventional or 375°F/190°C for convection. Melt beeswax in the microwave in 30-second intervals. Brush the molds inside with melted wax and place them on a sheet pan in the oven for 10 minutes. Remove and invert on a wire rack over a sheet pan to let excess wax drain out. When the molds cool, repeat this process three more times. Seasoning the molds this way ensures that your cannelés will have a shiny and smooth exterior. It also prevents them from sticking to the molds. Ideally, this process should be repeated each time you bake cannelés, but it can be done every other time after the first five bakes if the cannelés are unmolding easily.
– Beeswax can generally be found at specialty stores or online at several retailers. It comes in blocks or chips. I recommend chips simply because they are easier to melt; otherwise, they are the same.
– Copper cannelé molds do not need to be washed. To clean, wipe with a dry towel.
One Day Prior: Season the Molds
Prepare cannelé molds using the method described above.
Make batter
1. Combine the milk, butter, cardamom, and orange zest in a medium pot. Bring to a simmer over medium heat. Remove from the heat and let cool to about 100°F/38°C or lukewarm to the touch.
2. Whisk the egg yolks into the milk mixture. When they have been incorporated, whisk in the rum.
3. Whisk the flour, sugar, and salt together in a medium bowl. Whisk in the warm milk one-third at a time, scraping down the sides and bottom of the bowl between additions. Some air bubbles will form, but keep these to a minimum. When finished, the batter will have the consistency of heavy cream.
4. Strain the batter through a medium sieve into an airtight container. Before closing, cover with plastic wrap pressed directly onto the surface of the batter, to prevent a skin from forming. Press the lid of the airtight container on tightly. Refrigerate overnight to rest the batter.
The Day of the Bake
1. Place a rack in the center of the oven and preheat the oven to 450°F/230°C for conventional or 425°F/220°C for convection.
2. Warm the molds in the oven for 15 minutes before filling. Preheating the molds helps ensure the cannelés have a crunchy, caramelized exterior.
3. Brush the molds with a thin layer of melted beeswax. (Too much wax will cause the mixture to spill out of the mold during baking.) Gently mix the batter to reincorporate ingredients that may have settled overnight. Be careful not to over mix or risk incorporating too much air into the batter. The more uniform the batter is, the better the final product.
4. Fill each mold to about ¼ in/6 mm from the top, about 2¾ oz/80 g of batter each. When the cannelé bakes, it will rise slightly, then sink, so it is essential to leave a small space to account for this rise.
5. Place the molds on a sheet pan and bake on the center rack for 20 minutes. Rotate the pan 180 degrees, reduce the oven temperature to 350°F/175°C for conventional or 325°F/160°C for convection, and bake for 35 to 45 minutes more.
6. Let the cannelés, still in their molds, cool for 10 minutes. Turn the cannelé molds upside down and gently tap the top until the cannelé drops out onto the wire rack. Let cool completely before serving.
Complete Your Table
If you enjoyed the baking science and flavors in these cardamom and orange cannelés, here are a few more recipes from niksharmacooks.com to explore:
- Black Pepper and Cardamom Cannelés: Another spiced take on the classic, with black pepper adding a gentle heat that plays beautifully against the caramelized crust.
- Masala Chai Pumpkin Cake: Warm spice layered into a tender cake. A natural follow-up to the cardamom in these cannelés.
- Hazelnut Mascarpone Frosting: Rich, nutty, and deeply satisfying. Useful for any layer cake that needs a luxurious finish.
Frequently Asked Questions
Can I use silicone molds instead of copper? You can, but the results will be noticeably different. Silicone insulates rather than conducts heat, which means the exterior will not caramelize as deeply or as evenly. Copper molds are worth the investment if you plan to make cannelés more than once.
Where can I buy copper cannelé molds? Specialty kitchen stores, Dehillerin in Paris, and several online retailers carry them. Look for molds that are lined with tin or described as traditional cannelé molds.
Can I skip the beeswax? Not for copper molds baked at this temperature. Butter will burn before the cannelé is done. A 1:1 mixture of unsalted butter and beeswax is an alternative some bakers use with good results, but pure beeswax is the most reliable option.
Why does the batter need to rest overnight? The rest allows gluten developed during mixing to relax, gives the starch time to fully hydrate, and lets the cardamom and orange aromatics infuse deeply into the batter. Skipping the rest produces a less tender, less flavorful result.
Can I use a different spice or flavor? Yes. Vanilla bean is the classic. Earl Grey, rose water, or saffron all work well in the same quantities used here for the cardamom. Keep the orange zest or swap it for lemon.
How do I know when the cannelés are done? The exterior should be a deep mahogany brown, almost dark. Many bakers pull them too early; a pale cannelé will not have the characteristic crunchy crust. Trust the color.

6 Responses
I’ve never made canneles before, but I’ve always wanted to! I love this step-by-step description. Now I just need to find the molds… Also, breathtaking photos as always! xoxo
I was JUST reading about how to make these yesterday! I’m dying to try it out!
Ok you just took away my only excuse not to splurge and buy the copper molds. I have silicone and I know what you mean…they work but it’s not as good. You’re recipe looks amazing can’t wait to break them in😊
What beautiful tins, I bet coconut oil would also do the trick. Happy feasting!
I don’t see either orange or cardamom in the ingredient list!
I fixed it thanks, it didn’t save the first time on Squarespace for some reason.