
At some point, I knew I would take the plunge. It was only a matter of when and where. As long as I can remember, I’ve loved to cook, play with flavors and ingredients, make my own mistakes and learn. But I’ve also been yearning to learn more about techniques and train under a more formal setting in the culinary arts. So after much thought and careful consideration, I decided it was time to take a break from my life in science and health research and test the waters in a more professional environment. I wanted to see if I would really love it or not.
But before I jumped and enrolled in culinary school, I spoke with several chefs and bloggers, I even read a few useful articles such as this one by David Leibovitz and Jennifer. One piece of advice they all shared, go work in a professional kitchen before you make any decisions. So for several weeks now, I’ve been working as an apprentice at a French patisserie training and learning about pastry making. It’s true, the environment is busy, there’s literally no time to breathe, the hours are early and long, it can be repetitive but honestly, I find it exciting and I love it!
I had heard of many horror stories about differences in expectations and reality that I was very nervous to take this step but I’m very happy I took this initial step. Every day there is something new to learn, like the magic of snow sugar that I use in this recipe to how to achieve the perfectly sliced cut of mousse cake or simple things like how to move with speed and precision when there’s a sudden rush order for a large batch of cakes. But beyond learning, I’ve also developed a deeper appreciation for the creative minds and hardworking people that work in the kitchen. I have no idea what the future holds and I’m still debating on the right culinary program for me but for now it’s absolutely wonderful being able to do what you love!
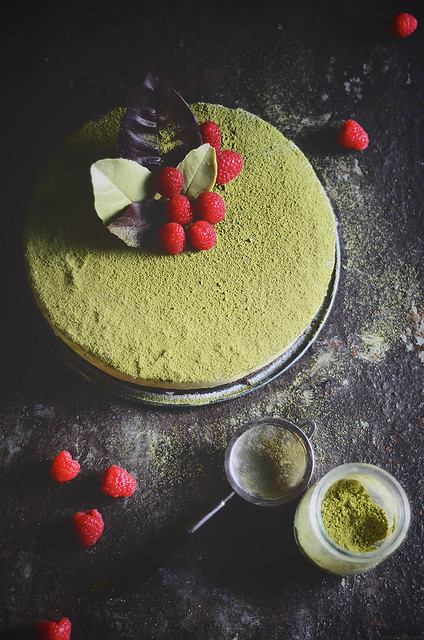
My matcha obsession is in overdrive. This cake might also make a good Christmas dessert with its color scheme and perhaps some chocolate holly leaves with raspberries but it also makes one decadent and delicious dessert for Valentine’s day. In many ways it also celebrates this new event in my life. Two types of chocolate and green tea, all layered and creamy smooth. You can make the cake ahead of time and then prepare the mousse on another day and eat it all up in one day. But since it’s Valentine’s day, you should supposedly share it with your beloved.

Here are some of my kitchen tips when preparing this mousse cake;
- You can use an 8 or 6 inch circular springform pan instead of the 9 inch pan I used. You will get a smaller cake but with a taller level of mousse.
- Freezing is your friend in this recipe. Not only does it make it faster to set the chocolate but it also helps to give you nice clean sliced cuts of the mousse cake.
- I only made 4 leaves of chocolate to decorate the cake but you can go all out! You will have a little leftover chocolate to make additional leaves.
- Make sure your gelatin is completely dissolved and smooth or you will end up with “streaks/threads” in your mousse and it won’t set properly.
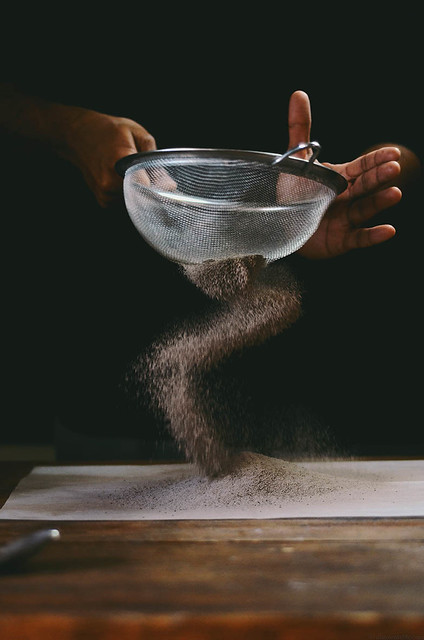
- Snow sugar is the pastry chef’s friend, as I have learned recently. We use it to waterproof stuff and prevent our decorations on pastries from getting wet. You can buy it commercially or make your own. I tested and tried this homemade version from Food52 which works very well, it’s definitely a keeper! I skipped the vanilla and used white chocolate chips (Ghirardelli). After you’ve pulsed the rest of the ingredients to as fine a powder as possible, transfer the powder to a ziplock bag, remove any excess air from the bag and seal it. Then crush the fine particles inside the bag using a rolling pin to form an even finer quality powder. Store it an airtight container and use as needed.
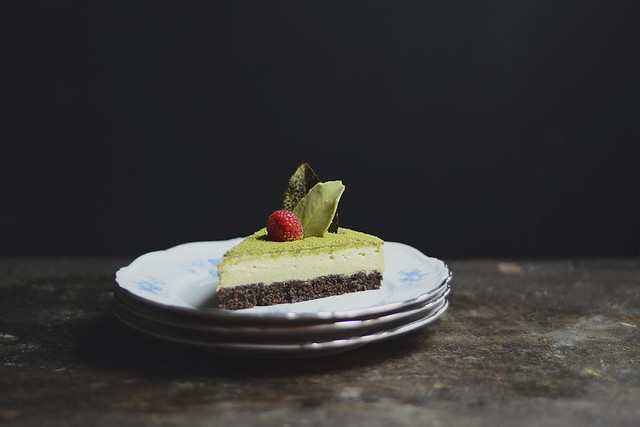
matcha chocolate mousse cake
yields: one 9 inch cake
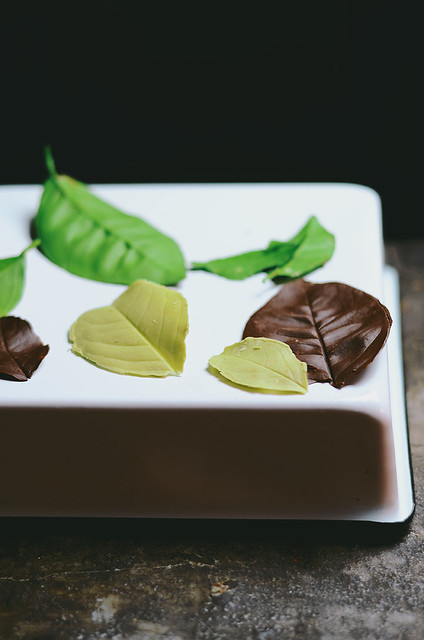
chocolate leaves
4 leaves – 2 small and two large (from a non-toxic plant, I used lemon tree leaves)
1/4 cup white chocolate chips
1 teaspoon matcha powder
1/4 cup dark chocolate chips (60% cacao)
1. Wash the leaves under cold running tap water to remove any debris and dirt. Dry the leaves carefully by patting them down with a dry kitchen towel. Keep aside on a baking tray lined with a sheet of parchment paper .
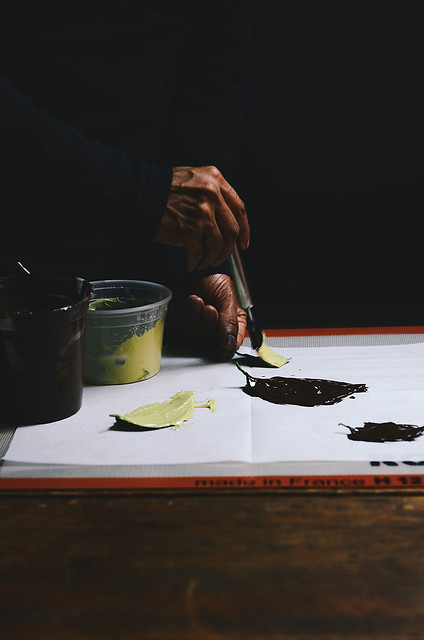
2. Boil some hot water in a small pan, remove the pan from the stove and place a small heat-proof bowl with the white chocolate and matcha powder and mix until the chocolate has melted and the matcha has mixed in completely to form a light green color. Using a pastry brush, brush the underside of one large and one one small leaf cleaned earlier with a thin layer (not too thin or they will break easily) of the melted chocolate. Place the leaves on the parchment paper from step 1.
3. In another bowl, melt the dark chocolate and paint the remaining two leaves just as you did with the white chocolate-matcha mixture. Place the leaves on the tray of parchment paper. Place the entire tray in the refrigerator to harden for at least 10 minutes.
4. Remove the tray from the refrigerator once the chocolate has hardened on the leaves. Carefully, peel the leaf away from the chocolate to reveal the molded chocolate leaf. Store the leaves carefully in the refrigerator until needed. (Note: Be careful handling the leaves after they set, since chocolate can melt quickly when exposed to body heat from our fingers, especially the dark chocolate)
dark chocolate sponge layer cake
ingredients
3/4 cup (3 3/4 ounces) all purpose flour
1 tablespoon cornstarch
1/4 cup (3/4 ounces) unsweetened dark cocoa powder
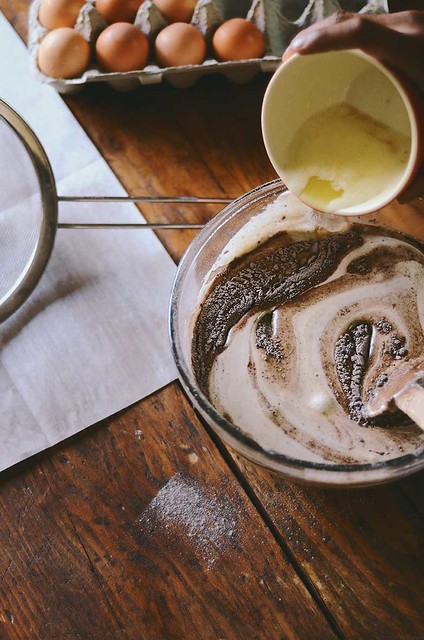
5 large eggs, cold
3/4 cup (6 1/4 ounces) sugar
1 tablespoon vanilla extract
6 tablespoons unsalted butter, melted and cooled
a little extra butter to grease a baking sheet
1. Line an 18’X13″ baking tray with parchment paper and grease it with the extra butter. Keep aside until ready to use. Place a wire rack on the middle shelf of the oven and preheat to 325F.
2. Whisk the flour, cornstarch and cocoa powder in a medium-sized bowl and then sift the mixture onto a separate sheet of parchment paper four times. Keep aside until ready to use.
3. Place the eggs and sugar in the bowl of a stand mixer and using the whisk attachment, whisk on medium-high speed until the eggs have tripled in volume and the entire mixture becomes pale and creamy. This should take about 5-6 minutes. Remove the bowl from the mixer.
4. Sift 1/2 of the flour mixture over the whipped eggs and fold carefully with a silicone spatula using an outward to inward motion. Make sure you reach the bottom of the bowl when folding to get the dry ingredients incorporated into the wet ingredients. Add the rest of the flour by sifting and fold in the same fashion until a few flecks of dry ingredients are barely visible.
5. Pour the vanilla and melted butter from the side of the bowl into the batter and fold the entire mixture in two sweeping motions. Transfer the mixture onto the prepared baking sheet and using an offset spatula even the surface carefully. The mixture will deflate a little but not too much. Place the pan in the oven and bake for 15 minutes, turing the tray halfway through baking. The center of the cake should be firm and spongy to touch. Remove the tray from the oven when done and allow to cool on a wire rack for 10 minutes. Remove cake with parchment paper from the pan and allow to cool completely. Then wrap the cake with cling film and refrigerate or freeze until needed.
matcha white chocolate mousse filling (adapted from Food and Wine)
ingredients
1 cup heavy whipping cream
1 teaspoon unflavored gelatin
4 tablespoons water
2 tablespoons matcha powder
4 large egg yolks
4 tablespoons sugar
8 ounces white chocolate, melted and cooled
1. Place the cream in a large mixing bowl and whisk with an electric hand mixer on meidum-high speed until the cream forms stiff peaks. This should take about 3-4 minutes. Cover the bowl with clingfilm and refrigerate to chill before use.
2. In a small mixing bowl, pour the gelatin over two tablespoons of water and allow to bloom. Heat the remaining water in another small mixing bowl and mix the matcha powder to form a smooth paste. Pour this mixture over the gelatin and stir until you get a smooth liquid.
3. Place the egg yolks in a large mixing bowl with the sugar and whisk on medium-high speed until the yolks become pale and creamy for about 4-5 minutes. The mixture will thicken considerably. During the last 30 seconds, pour the gelatin mixture from the side of the bowl and whisk this into the eggs. Finally, whisk in the melted chocolate until completely combined. Fold in half of the chilled whipped cream using sweeping outward to inward motion with a silicone spatula (just like you did for the genoise cake). Fold in the remaining cream and keep aside.
cake assembly.
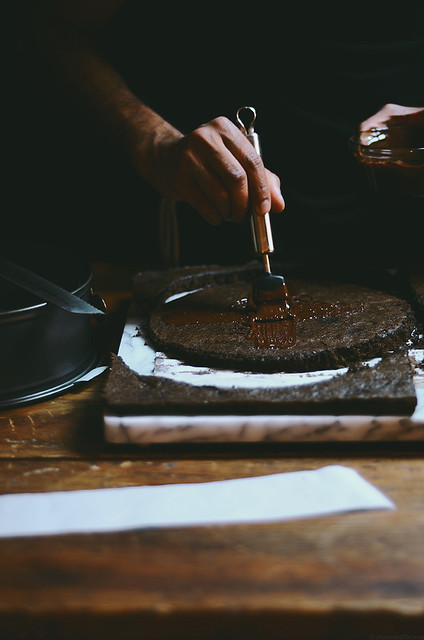
4 tablespoons melted dark chocolate
1 generous tablespoon snow sugar (read my tips above on how to prepare it)
extra matcha powder to dust (I used a little under 1 1/2 tablespoons for a light coat)
a handful of fresh ripe raspberries
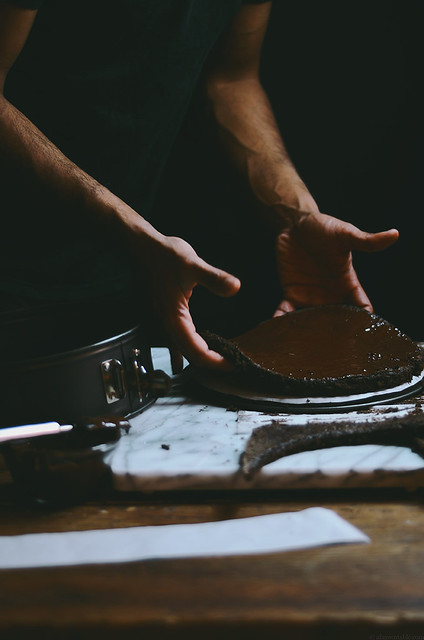
1. Cut a 9″ circle of the prepared and pre-chilled/frozen chocolate genoise cake (NOTE: You can also just use the ring of the pan to cut the circle, before you line the side of the pan with the strip of parchment paper). Save any extra leftovers and unused cake in the freezer by wrapping the cake in clingfilm and then in airtight bag.
2. Take a 9″ X 2.5″ circular springform pan. Cut one 9″ circle and a 28″ X 2″ strip of parchment paper. Line the base of the pan with circular sheet of parchment paper. Using a very little amount of vegetable oil or melted butter, line and stick the strip of parchment paper around the ring of the pan. Assemble the pan together with the ring.
2. Place the cake on the base of the lined pan. Using a brush, coat the exposed surface of the cake with a little bit of the melted chocolate in a thin layer. It does not have to perfect, you want just enough to prevent the cake from getting too soggy. Allow to cool until the chocolate has hardened and set, this will happen fast depending on how cold the cake is. If the chocolate is taking too long to set, freeze the entire pan with the cake for 2-3 minutes until hardened.
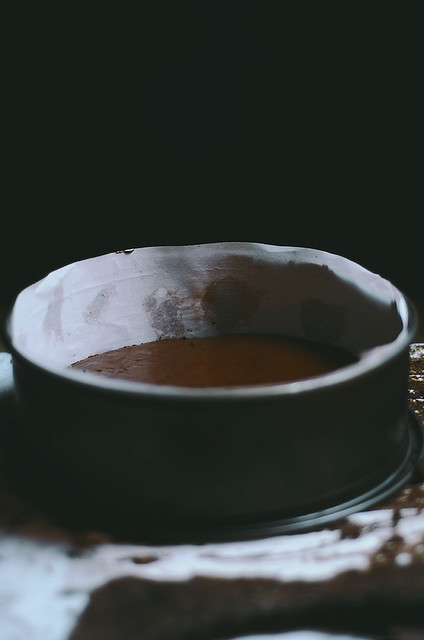
3. Pour the mousse filling over the cake after the chocolate layer has hardened. Level and smooth the surface with an offset spatula. Cover the pan with clingfilm and refrigerate for at least 4 hours to overnight. You can also freeze the cake at this point.
4. Freeze the cake in the pan for at least 2 hours before decorating. To release the cake, unlock the springform pan. Dust the surface the cake first with a thin layer of the snow sugar and then with the matcha powder using a tea strainer. There should be no visible white spots from the snow sugar. Then slowly unwrap the parchment paper from the sides of the cake. Slide the cake onto a cake board and decorate with the prepared chocolate leaves and a few fresh raspberries. Cut the chilled mousse cake with a sharp serrated knife (Note: It is easier to get nice clean cuts using a sharp serrated knife on a frozen mousse cake, just wash the knife between each cut to keep it clean).

33 Responses
this is such an exciting news!! it takes a lot of courage and passion to leave behind your comfort zone and take that plunge. so happy for you Nik. Looking forward to more pastries and more beautiful creations 🙂
Nik:
To say this cake is beautiful would be an understatement. So lovely.
And I admire your interest in learning. The stint you are doing now in the pastry shop will be invaluable.
As a culinary school graduate, I agree that the best thing to do before taking the plunge in to a professional program is to work in a professional kitchen first to see what the atmosphere is like, if you enjoy the work, and the setting.
I am happy I went to culinary school but I hated working in professional kitchens. Decide what your goals are before you make the investment of time and money. Best of luck to you. D
A fabulous and refined cake! Perfect for Valentine’s Day.
Cheers,
Rosa
That looks amazing – like a work of art!
First of all this recipe is fantastic. And secondly I am so excited about the new opportunities coming your way. Testing this path was a smart decision and it seems to be telling you that your path is clear. Congrats.
Gorgeous gorgeous gorgeous — as usual. And I’m so excited for you! Can’t wait to see and hear about all you learn. Best wishes on your new journey, Nik!!
Nik, Congratulations !! What a ballsy move and kudos to you for making that step away from comfort zone into something that you love! Rooting for you all the way to being an awesome pastry chef. Putting my order in for a cake when you have your own place! :))
Great news. You are bound to learn so much from working in a kitchen…it’s a whole new world of sanitiser, bleach and steam burns!! So exotic. It beats reading a cookbook and trying to figure it all out on your own. I’m so excited to read about your journey. This cake look like the perfect place to start. Good luck, Nik.
It was SO SO smart for you to work in a bakery first. Your going to make a truly informed decision and whatever choice you make is going to propel your career forward. Can’t wait to follow along 🙂
OHMYGOSH DREAM CAKE!!!!! Can I come over?!?! And that is SO EXCITING about culinary school!!! Congratulations!!!!!
This matcha is everywhere…I decided to make a matcha cake for when our latest bundle arrives in our nest. My youngest for now insist we make her a "birthday cake" when she is born. It looks intense though I have no patience when it comes to things in the kitchen…wish me luck.
Nik, this cake is UNBELIEVABLE. It’s gorgeous and the flavors are just perfect and everything I want! Congratulations on taking the plunge; it’s something I dream about often, and I’m so jealous of people like you who are brave enough to do so. Looking forward to hearing more about it!
I worked as a professional baker for a couple of years. It was the hardest physical labor I have ever done. Be sure you get a gel mat for your work area, if at all possible. I ended up needing knee replacement surgery. Wish I had had a mat back then.
What a wonderful post, Nik! It’s so great that you’re doing what you love… I hope everything works out for you & can’t wait to hear more about this incredible journey.
This cake is just stunning. 🙂
I love your photography and your sweet foods. I love reading about your trips to India and all the food you write about. Many people here in Japan want to start a bakery but they are later shocked at the super long hours and all the hard work. It is good to try it out first and then decide what YOU really want to do. You are so talented! I am sure you will make the decision that is best for you! All the best!
Wow, go you and congrats!! You are such an inspiration and I could not be more excited for you. I know you are going to do amazing things! Also, your writing is incredible, this was like a breath of fresh air to read! Cannot wait to read more about your days and new life.
And this recipe? Well that is just gorgeous and the photos stunning as always!
That’s very exciting news! Well done for taking the plunge and moving out of the comfort zone, look like its paying off from this post (not that your desserts weren’t already amazing before….)
This is such a fabulous cake Nik! From the perfect slice to the delicate leaves – super impressive! I look forward to hearing more about what you’re learning when I see you in Florida. Congrats on the new adventure.
so happy for you, nik! it seems like you have a passion for doing what you do, and it constantly comes across in your beautiful creations! this cake is beyond beautiful and imaginative – those leaves though! all the best to you in your future plans! xo
Oh my gosh, Nik!!! This is the best news — I am so so happy and excited for you!!!! It’s hard to express how much admiration I have for you for taking the plunge. You are such an inspiration and I can’t wait to hear more about this incredible journey. GO YOU. And this CAKE! If anything it just proves you need to be doing this full-time 😀 what a masterpiece!! That dreamy silky mousse, the colors, textures, the garnish — it’s perfection. The hugest congrats to you, Nik! Thanks for sharing your passion and your gift with us :):)
You know, I need to give matcha another go. I’ve only had it in a few desserts and it’s been too long. This cake looks so incredible, Nik. Seriously blown away and inspired.
I only have one word… : GORGEOUS! Wow, this cake looks amazing and the photography is beautiful…!
Wow, I can’t wait to try this recipe and impress my friends, although I’m not sure it will come out as beautiful lol! Wow, very impressive, thank you for sharing! 😀
My icing skills aren’t the best and if I can do it, you most certainly can 🙂 !
Hi, I just discovered your blog through this post while I was looking for a matcha/green tea dessert recipe. I have to say the cake looks amazing! May I ask though what exactly the mousse tastes like? How is its consistency? What is the overall sweetness of this dessert like? I am pretty inexperienced in the world of western desserts so while I want to make this cake I do have some reservations, as more often than not I have found that attempts at cooking using blog recipes have yielded results that did not quite fit my tastes.
Hi Dan, It tastes like any other mousse cake when it comes to texture. The texture will be smooth if that helps. Good luck.
Haha I actually just went ahead and made it yesterday. Despite having to bake it in a toaster oven (had to do it a lot longer than 15 min) and not having a springform pan or pastry brush, I think it turned out looking ok. Nowhere near elevated as the way yours looks but it tastes great! I’m so glad I found your blog and will definitely look forward to trying out more of your recipes! Thanks so much for the effort you put into maintaining this blog.
And as a bonus, here’s a picture of a slice! http://i.imgur.com/zntcZiv.jpg
Awesome Dan! It looks beautiful and I’m glad you tried and liked the cake.
HELLO! this recipe looks hella amazing and beautiful. has always been on my BOOKMARK page but never had the occasion to make it. BUT it’s my boyfriend’s birthday on Monday and i’m wondering if this cake keeps well? Like, if i make it on Friday, would the cake be dry ++ by monday? THANKS SO MUCH (:
Hi Pong, I’ve frozen it after making but wrapped it airtight. I think you should be fine as mousse cakes are often frozen.
Hi! This cake is beautiful and I’m really excited to make it. I’m actually going to adapt Julia Child’s mousse recipe because I have friends who can’t eat gelatin. May I ask why you bake the sponge cake on a 18 x 13 baking tray and then cutting it instead of baking a smaller amount in the springform pan? Thanks!
Hi Liana, I used a sheet cake pan over a regular round pan because I wanted the cake layer to be slightly thinner. If you bake it in a round pan you can cut the cake to any thickness you want but it also cooks faster with this method.
Your enthusiasm and love of food really shine through your photos and the foods that you cook. Kudos for having had the courage to leave behind what was more comfortable and traditional for a path that feeds and nourishes your passions and dreams!
Thank you so much, I’m very happy to have taken the leap!