


homemade egg pasta dough
One of the best local pasta restaurants (and one of my top favorites) in San Francisco is Flour and Water/Ten Speed Press (2014); they have a gorgeous book of the same name where Chef Thomas McNaughton talks about his love for pasta and an equally interesting and wonderful collection of recipes to cook. This egg pasta recipe from the book is easy to make and has plenty of tips to make it a smoother process for a first-time pasta maker.
Ingredients
12.7 oz/360 g all-purpose flour
1 1/4 tsp fine sea salt
18 (10.6 oz/300 g) large egg yolks
1 1/2 tsp extra virgin olive oil
a spray bottle with clean tap water at room temperature
Instructions
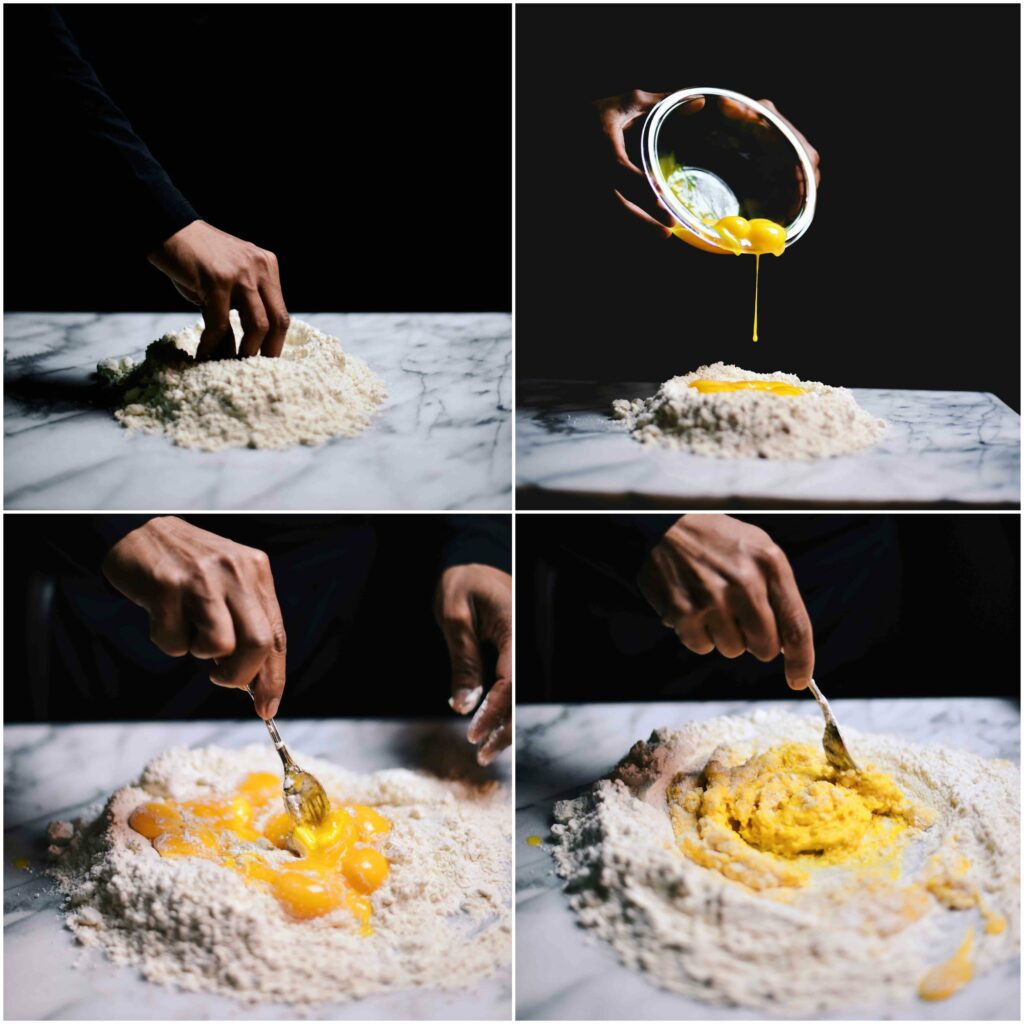
- Place the flour in the shape of a mound on a clean and dry surface. Using your hand, make a deep well in the center of the flour and sprinkle the salt in the well.
- Carefully pour the egg yolks and olive oil into the well, and then, using a fork, gently mix the egg yolks by stirring and scraping from the bottom to the work surface as you proceed. Avoid touching the “walls” of the flour during this stage.
- Once the yolks are mixed, start to slowly incorporate the walls of the flour, gradually working your way outwards and thereby incorporating more and more flour as you proceed. If the yolk mixture spills out of the walls, push them back and reform the “walls” using your hands.
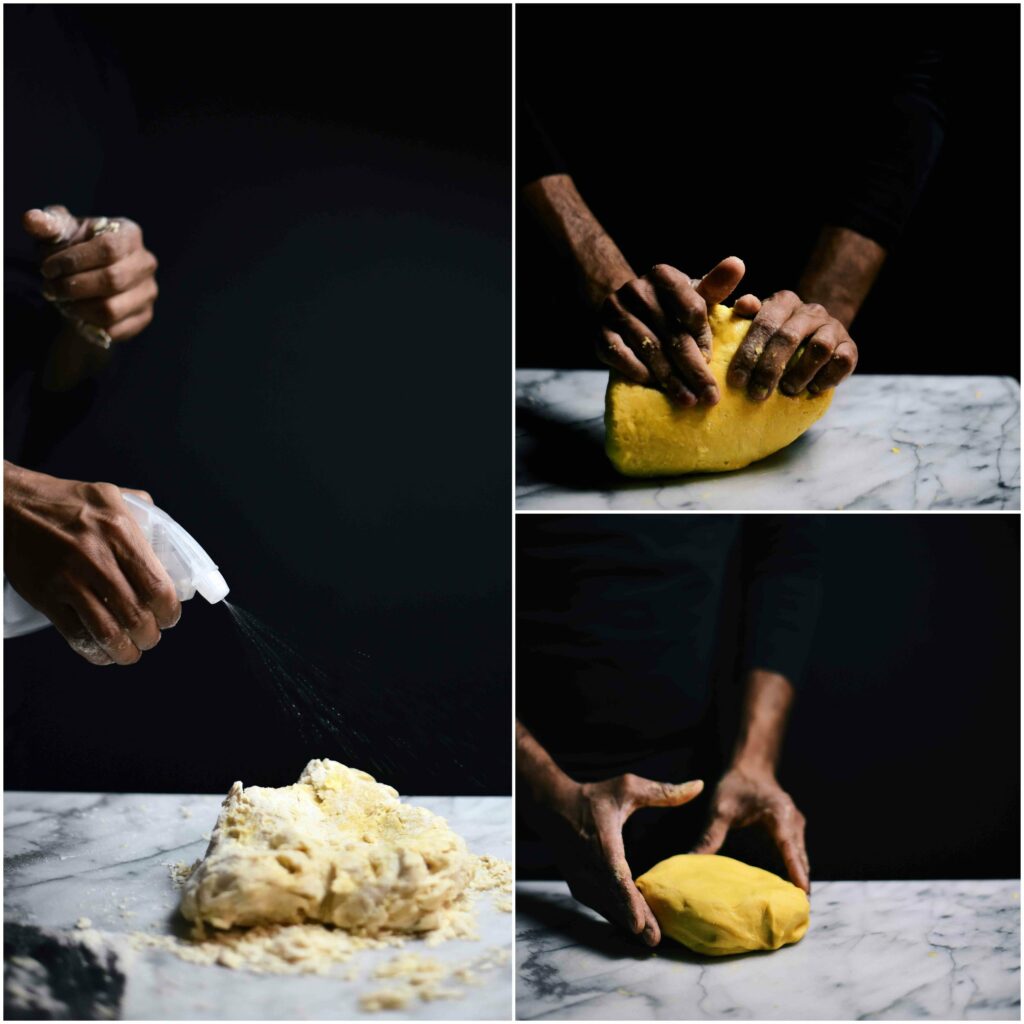
- Once the mixture starts to acquire a more solid texture, remove any material that is attached to the fork. Then, using a bench scraper, release the wet dough that is attached to the work surface and, using your hands, start to bring the dough together to form a single mass. While working the dough, mist the dough liberally with water to moisten it and bring it together. The dough will dry at first, and as you spritz with water, it will start to get wet, and eventually, all the flour will be incorporated into the dough ball.
- Knead the dry dough by hand for 10 to 15 minutes. It will transition into a smooth, pliable, and flexible dough with a bright, shiny yellow texture. Wrap the dough in cling film and allow it to rest for at least 30 minutes at room temperature before use. Do not store for more than 2 days as the yolks will oxidize with time (see notes above).
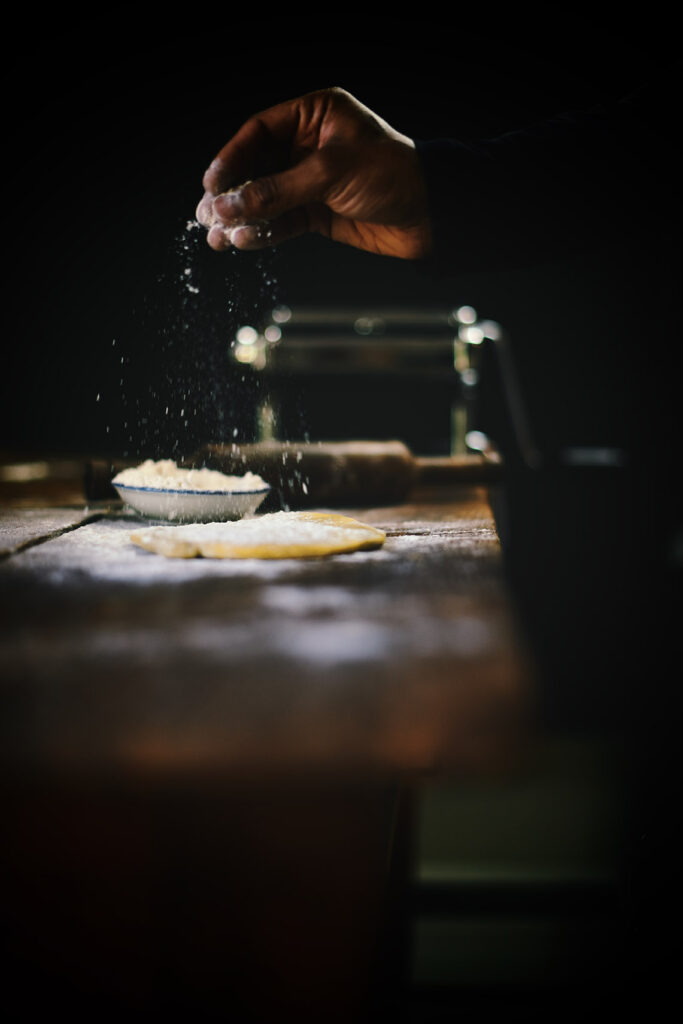
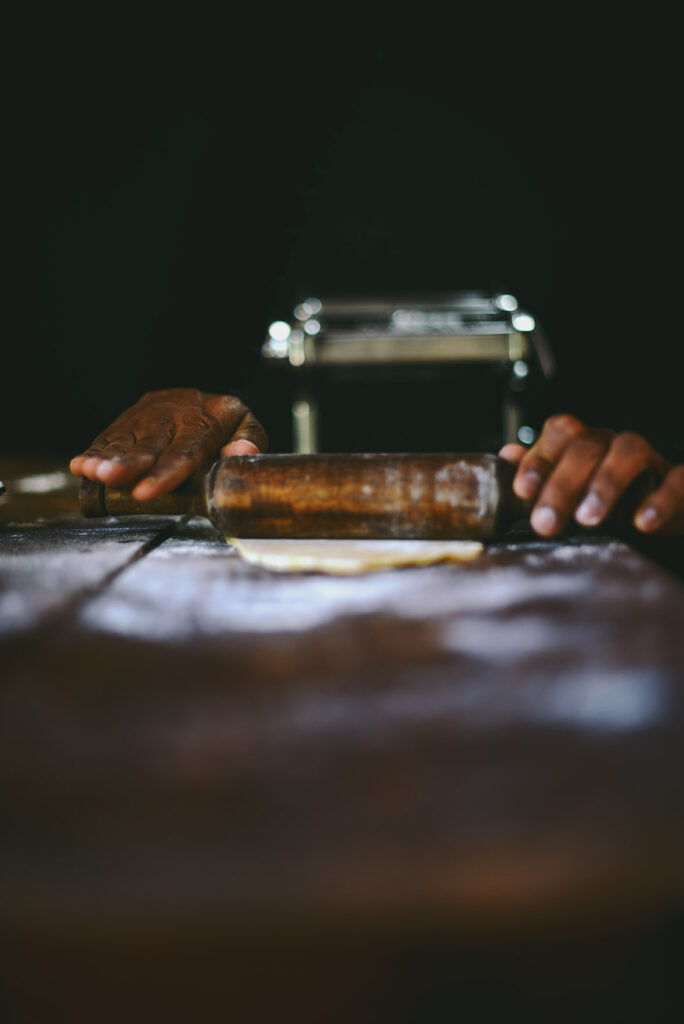
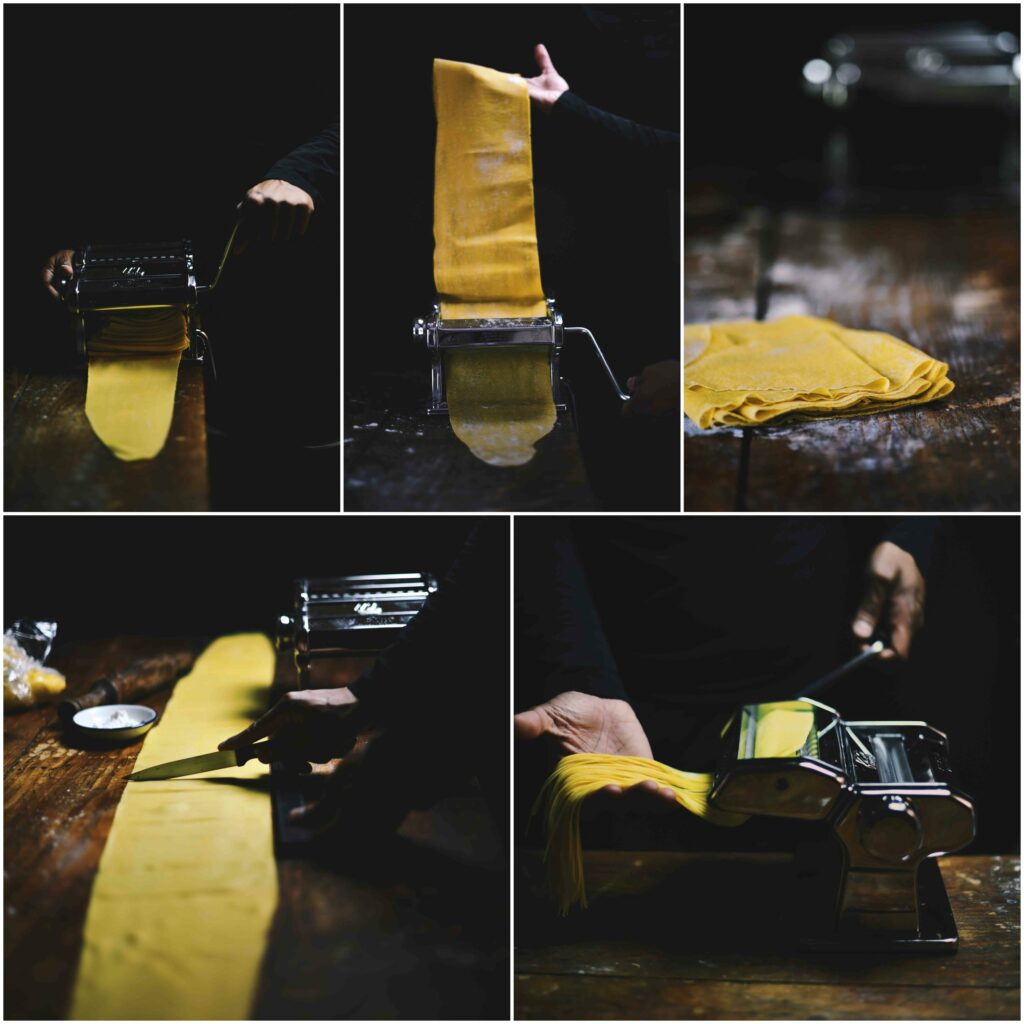
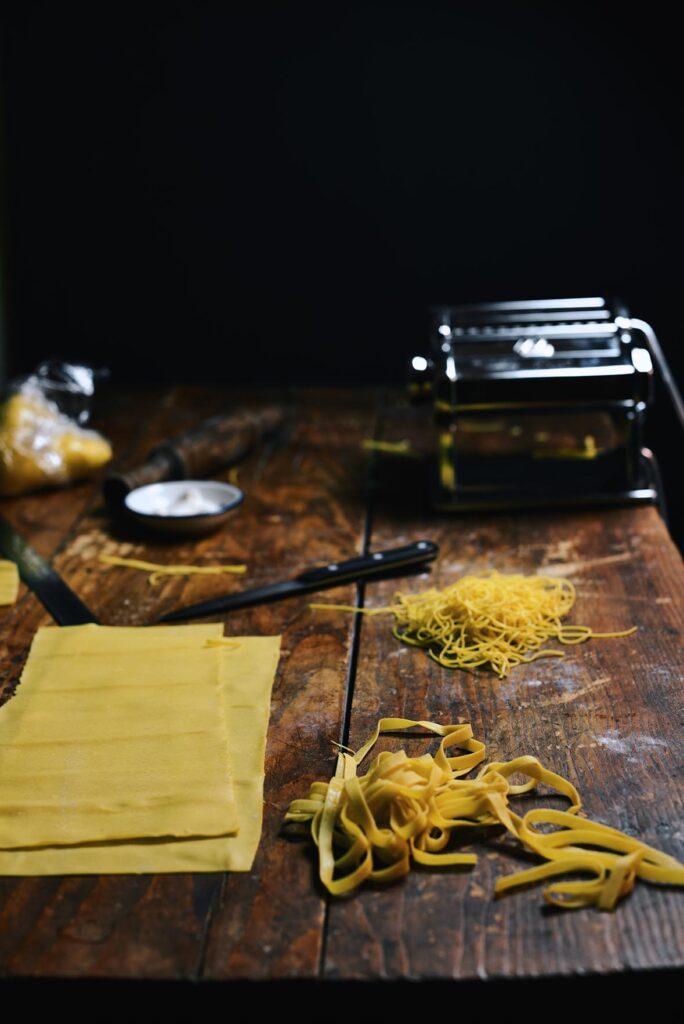
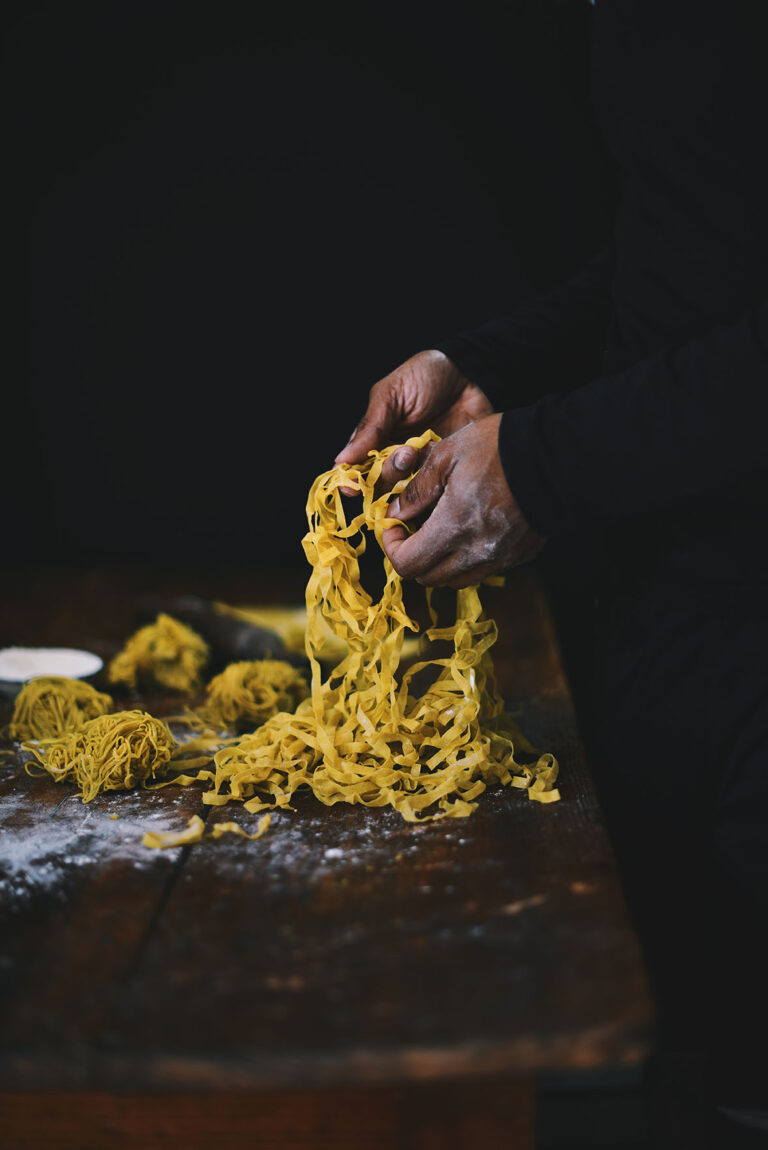
- To roll out the dough, unwrap the dough and divide it into 4 equal parts. You can use the manufacturer’s instructions on your machine or form one part into a ball. Place it on a clean, very lightly floured surface and roll out the dough to a thickness that will just fit into the widest setting of your pasta machine. As the dough is dry, it is unnecessary to add any extra flour while rolling it into the machine. Start with the widest setting on the flat rollers and pass the dough through the machine 3 times. It will double in length. Then, decrease the width of the flat rollers and repeat the same process. The ideal width of the pasta sheet should allow you to have a finger’s length space on each side, so there is plenty of room in the machine. Keep the speed consistent when you roll out the dough. As the dough gets thinner, it will dry faster and will get stiffer easily. So cut it immediately as soon as it forms and use it to cook.
Notes
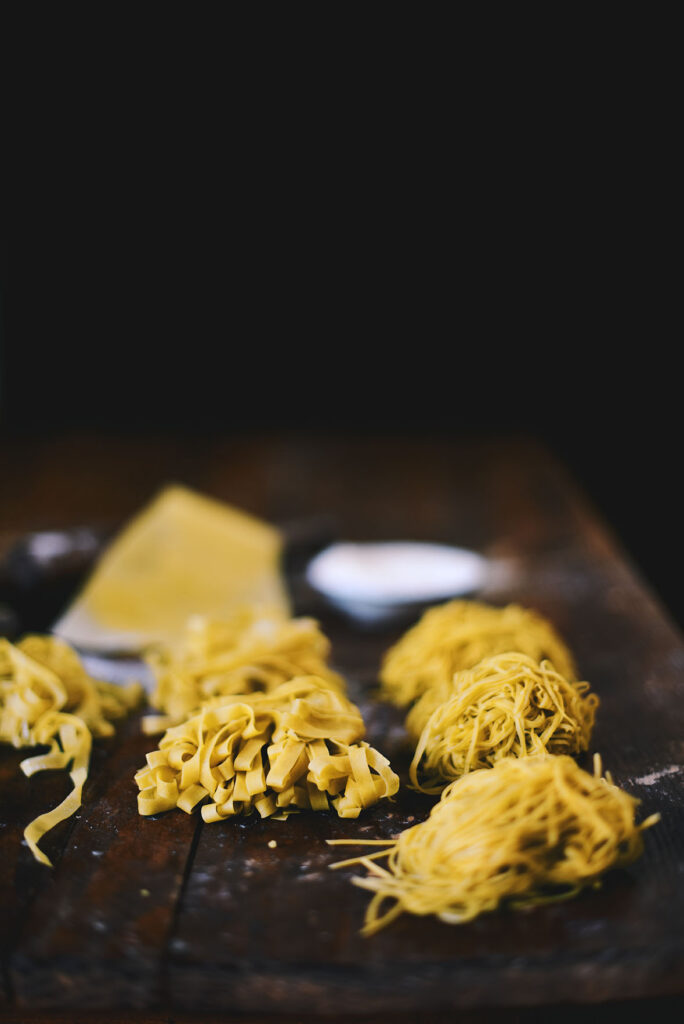
- Though the book recommends using this dough for hand-cut noodles such as tagliatelle, farfalle, and garganelli, I did use a little leftover dough on the spaghetti blades of my machine to see how it would work. The taste and texture were great! However, the book recommends using the semolina extrusion dough for spaghetti. I don’t own an extruder, so I didn’t try this dough.
- The number of yolks might seem intimidating (use the leftover egg whites to make egg drop soups, omelets, scrambled eggs, meringues, macaroons, etc.), but it was worth it. You can try to halve the recipe (I didn’t do that, but I think it should work).
- Kneading the dough by hand for 15 minutes was probably the most tedious part, but watching the dough transition from dry to extremely soft and pliable was also exciting.
- This is a fresh pasta dough. I left half of the unused dough wrapped in the refrigerator overnight. I noticed the exterior surface developed very tiny black dots, which I suspect is due to some oxidation effects from the air with the natural sulfur present in egg yolks. Just before I worked with the dough, I warmed it to room temperature for 45 minutes and then kneaded it for 1 to 2 minutes. The black dots will be diluted out by the rest of the dough, which is bright yellow, and it will not be noticeable. The book does mention not storing this dough for more than 2 days due to the discoloration effect.
- Work fast with this dough because it dehydrates quickly as it is being worked on. It will become stiff quickly as it is rolled out, and evaporation will increase as it gets thinner.
- I bought this pasta maker, which is really easy to use and assemble. Don’t get it wet or wash it; it will rust (per the manufacturer’s instructions). Just brush off the flour in the blades to clean.
- Follow your pasta machine’s manufacturer’s instructions for more specific notes on rolling out the pasta dough. I’ve shared a few tips from the book that I found helpful in the recipe at the end.

12 Responses
Wow Nik, this is truly stunning. I have the same pasta maker – it was a wedding gift, but it’s been sitting in its box for the good part of the year. I’ve been too intimidated to try it, but your photos are very helpful in depicting the process. Really, gorgeous work, Nik!
Absolutely breath taking photos so atmospheric. Love the intense yellow of the pasta.
Happy Birthday, Nik! As always, thank you for sharing your many gifts with us. This pasta looks amazing. D
Like you said, this is such a big project; I truly love ALL your photos here. Such a stunning post, it’s so inspiring 🙂
I can’t wait to see your future posts and the list of your favourite restaurants in SF.
By the way, happy belated birthday 🙂
I can’t get over how amazing these photos are, Nik. Seriously, I could stare at them all day! And your homemade pasta looks incredible.
Absolutely gorgeous, there’s something about handmade pasta that cannot be topped.
YOU are amazing and wildly talented. That is all.
i have the same exact pasta machine which i bought on a whim. i did try making pasta 2-3 times, thanks for the reminder. love love love your photos.
GORGEOUS photos, Nik! So impressed!
Many happy returns to us from your birthday gift! These photos? Breath. Gone.
Most of the pasta we consume is homemade because it’s SO much better than the boxed stuff from the store. Yes, it can be time consuming, but I think you prove here that it’s totally worth it.
That last image is absolutely stunning, Nik! I was just watching something on TV last night about homemade pasta, and I learned that pasta makers tend to make pasta with bronze dies, as it creates a rough surface on the pasta in order to carry the sauce. I think we would typically look at smooth pasta as more impressive, but apparently not!
It is truly remarkable about how much thought has gone into each and every different cut.